7. Setup Amazon Database
Ok, here’s a set of screen shots on how to set up a database to use.
7.1. Create the Amazon Database Instance
Go into the RDS section of AWS.

Go into the RDS section of AWS
Launch a DB instance.

Launch a DB instance.
Select your engine. We’ll use the standard creation, MySQL (not Aurora) and select only free-tier options. (Important!)

Select your engine.
Set the instance specifications. Change the default username to something different to make the login harder to guess. You can use letters and underscores for the name, no dashes. Store username and password OUTSIDE your github folder. Password should be 20-25 random letters and numbers. Avoid special symbols. Use something like https://passwordsgenerator.net/

Set the instance specifications.
Important
Use a Strong Password! Don’t store it in GitHub!
There will people trying to guess the password of your database. Create a long random password and make it secure!!! Also, don’t re-use a password you’ve got somewhere else. Because we’ll be putting the password in an insecure location.
Also: We will be storing the passwords in an XML file. If you use special symbols like &, <, and >, then you’ll have to encode those in your XML file. I’d recommend just not using those symbols.
Next up, set up the connectivity. Ideally we’d only access the database through our app server for extra security. We’re not going to do that, and open it up so we can access it remotely.
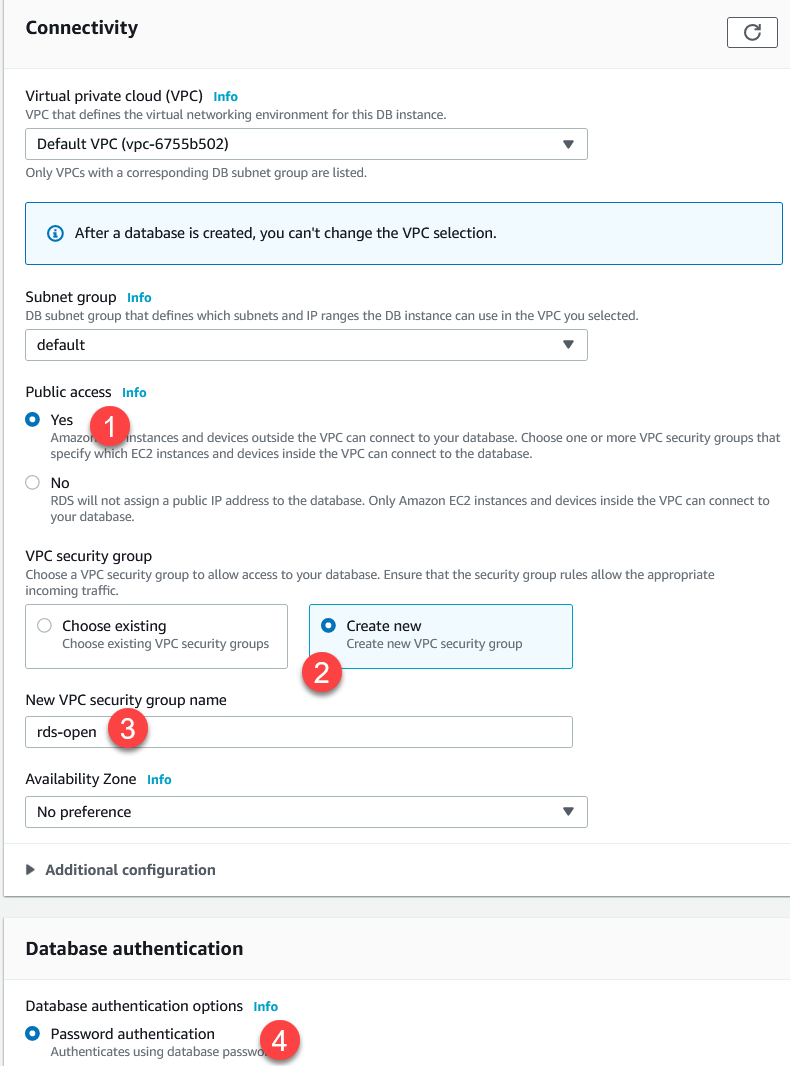
Set the connectivity.
Then you’ll get a screen where you can create the database. Afterwards, wait for it to be created:

Waiting for the database to be created.
…and wait. And wait. Finally, after it is created, you’ll be able to get your database server name:
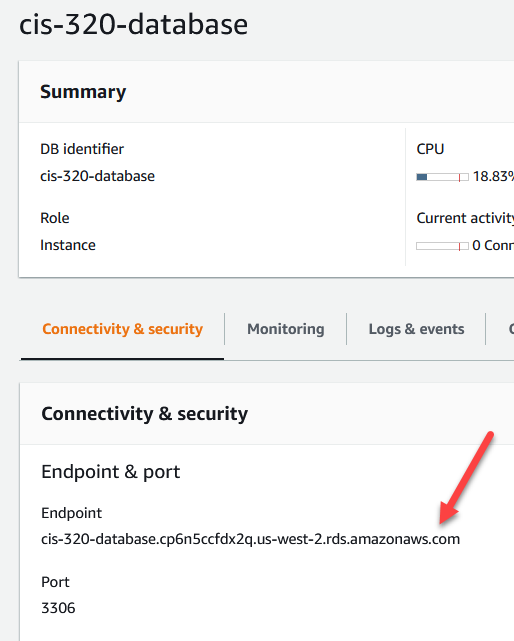
Get the address for our new DB server.
ALSO, if you move what computer you access the DB from (or what NAT you go through) you won’t be able to connect. The firewall won’t allow a connection at all. You’ll need to go modify your security connections and allow your IP to have an “inbound” connection.
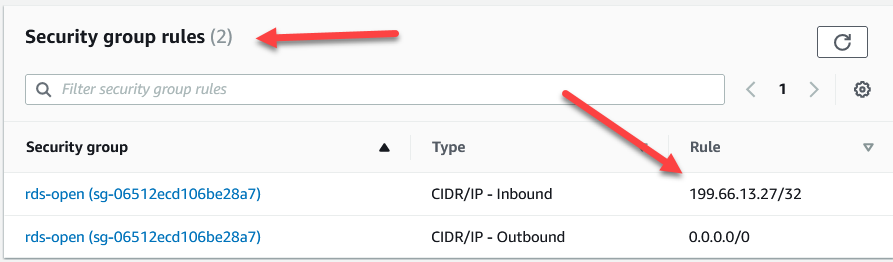
This will only allow your current address to connect.
7.2. Administer Database
Ok. Now we have a database. But no way to administer the database. You know, create tables, see what’s in it, run ad-hoc SQL.
We are going to connect via MySQL Workbench. You can download it from the site or go to Scholar and download from the link on resources. The site is a bit confusing. Download the 64-bit version, and don’t bother to register.
Open up a new connection by using the non-intuitive button:

Add connection in workbench
Set it up like the screen below. Also hit “Test Connection”. Save the password in the password vault so you don’t have to keep redoing it.
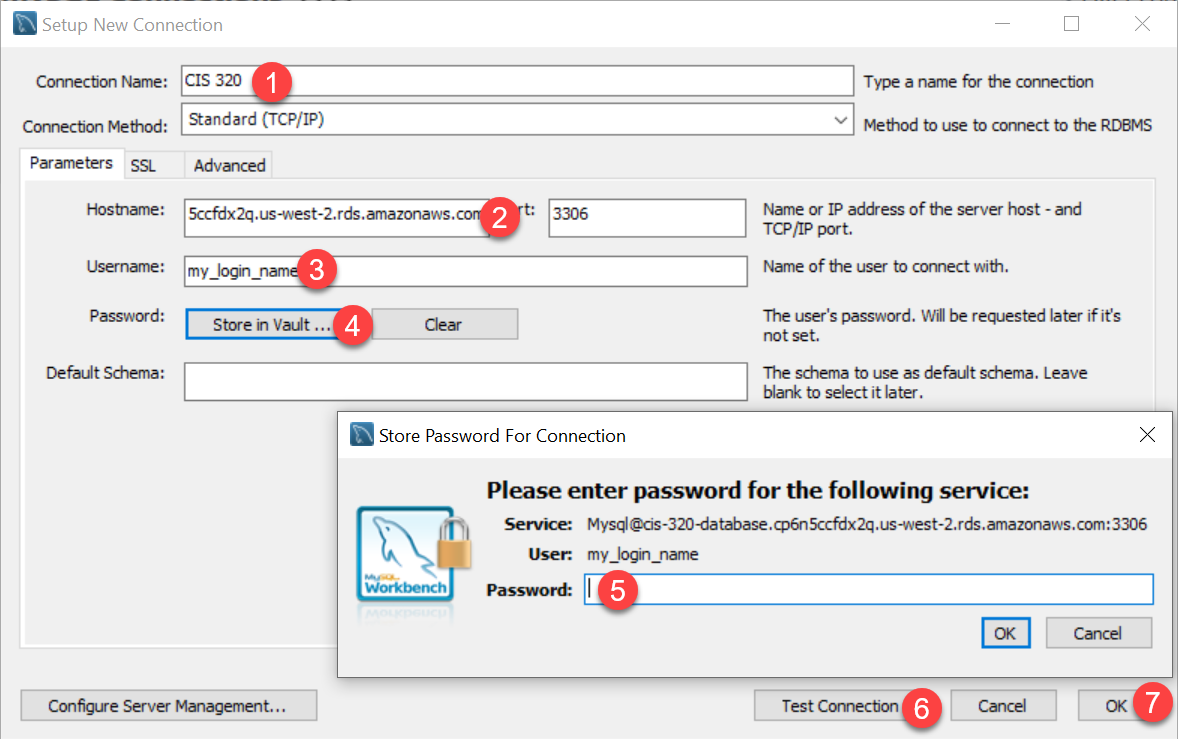
Setup connection in workbench
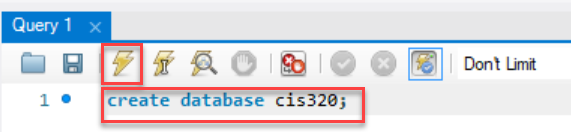
After that, run some SQL to create our database:
create database cis320;
Do this by typing in the commands from the window, then hitting the lighting bolt to run. Like the image below:
Next, tell it you want to use the database you created:
use cis320;
Now, create our table plus a couple records:
CREATE TABLE `cis320`.`person` (
  `id` INT NOT NULL AUTO_INCREMENT,
  `first` VARCHAR(45) NULL,
  `last` VARCHAR(45) NULL,
  `email` VARCHAR(255) NULL,
  `phone` VARCHAR(15) NULL,
  `birthday` DATE NULL,
  PRIMARY KEY (`id`));

INSERT INTO `cis320`.`person` (`first`, `last`, `email`, `phone`, `birthday`) VALUES ('Paul', 'Craven', 'paul.craven@simpson.edu', '5159611834', '1954-01-02');
INSERT INTO `cis320`.`person` (`first`, `last`, `email`, `phone`, `birthday`) VALUES ('Sam', 'Simpson', 'sam@simpson.edu', '5159611212', '1903-01-01');
Try inserting your own records. You can view the records by:
select * from `cis320`.`person`;
Yay! We are done with that setup. Next chapter we’ll learn how to do DB connections in Java and pull this data out.