3.2. Distributed Version Control System Tutorial
Learning version control, and Git, is one of the hardest parts of this class. It confuses even experienced programmers. So DON’T PANIC! Ask questions when you get stuck. It is normal even for those with years of experience.
Git stores all the code in your project into a repository. Typically, there will only be one repository per major project you create.
All the code that you have should go into a folder. From the prior section, you should have a project folder that has your HTML files, and probably a sub-folder with images.
We are going to show you how to create a repository with that folder,
push it out to a server, and then keep the changes between multiple people
in sync. To do this, we will use a program called git.
3.2.1. Quick Reference
3.2.1.1. Commit and Upload
Do this whenever you are done with a session of programming:
- Open “command prompt” on Windows, or “terminal” on MacOS.
- Change directory to your project. If it is on your desktop, start by
typing
cd Desktop. (If you use OneDrive, you may need tocd OneDriveBEFORE changing to the Desktop.) Then typecd mydirectorynamewhere the name of the directory will be the same as the name of your repository on GitHub. You can usually type in the first few letters and hit <tab> to fill in the rest of the directory name. - Type
git pullto get all the latest changes. - Do your changes.
- Type
git add -A - Type
git commit -m "Work on lab 1"Update the comment between the quotes to whatever you did. - Type
git push
If you get an error while pushing, see What If You Can’t Push?
3.2.2. Installing Git
First, if you are on your own computer, install git. (Skip this step if you
are on a lab computer.)
Windows Installation: You can download the program from https://git-scm.com/downloads
The git program has a lot of dialog boxes that
pop up asking questions. The defaults are fine, just keep hitting “next” or
“ok.”
** Mac Installation:**
If you are on a Mac, open up the “Terminal” program, which is in
your Applications folder, and from there, inside the Utilities folder.
Once open, type git at the command prompt and if the Mac doesn’t have
it installed, it will ask if you’d like to install it.
3.2.3. Creating And Committing To The Repository
Our repository commands will be typed in. There are graphical programs that
let you run git commands, however in my experience it is harder to learn
git this way.
3.2.3.1. The Terminal
If you are on a Mac, open up the “Terminal” program. If you are on Windows, open the “command prompt”.
3.2.3.2. Directory
When you are working on a command prompt, you are in something called a “working directory.” All your commands will operate on the current directory. On Windows, the command prompt will print the directory you are in.
To get the full directory you are in on the Mac, type
pwd which is short for “Print Working Directory”.

You can see the files that are in the folder by typing in dir on Windows and
ls on the Mac.

3.2.3.3. Change Directory
We need to change our working directory to the same directory that has the project.
If you are on a Windows machine, and you have your work on a flash drive or some
other drive, you can switch to that drive by typing the drive letter and
a colon. For example: e:. If your work is on the c: drive, or you are
on a Mac, you can skip this.
If your work is on the desktop, type cd Desktop. Then type dir to see
if you can see your project folder. Then type something like cd my_project.

If you need to go up a directory, type cd ...
If you can’t figure out exactly what directory you need, you can copy the path from the file explorer window. Just right click on the path and hit copy:

3.2.3.4. Tips For Fast Typing
When typing in file names, you can usually type the first few letters and then hit the <tab> key. If you typed in enough letters, the computer will fill in the rest for you.
You can hit the “up” arrow to get commands you previously typed in.
3.2.3.5. Initialize Repository
Once you are in your project folder, you should be able do type dir (or ls on the Mac)
and see your public_html folder.
We need to create our repository. You’ll only do this once for this project, and only by one person on your team. Otherwise you’ll have multiple projects and that will just be confusing.
To create the repository type git init:

3.2.3.6. Add Changes
Now that you’ve created the repository, we need to add all your files to it.
You can add them individually by git add <filename>. For example git add index.html.
But if you want every file - and we do - you can use the -A option for
“all”. So type git add -A:

3.2.3.7. Commit Changes
Now that we’ve added the files to the repository, we need to commit them. This will freeze the changes and let us go back in time if needed.
We need the git commit command. You also need to include a message
that describes what you did. These messages are important, particularly
when you work with other people.
You can add the message by the -m parameter. The message must go in
quotes. For example, git commit -m "First check-in of project."

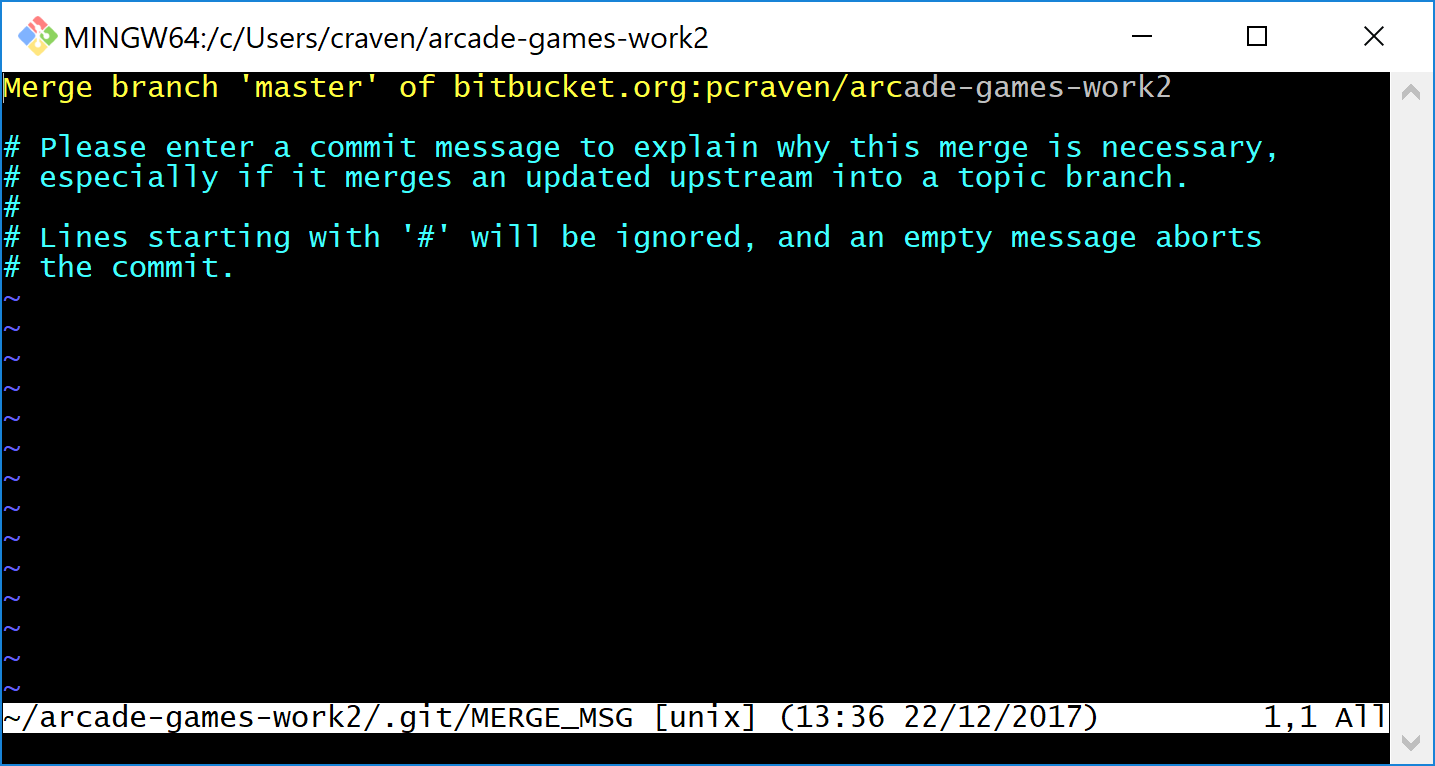
There are two things that commonly go wrong at this point. If you forgot the message, you might get a window that looks something like:

This is “vi”, a text editor that you can use to enter your comments that
you forgot. But vi is hard to learn. So we just want to exit out and try
again. To exit, hit the “Escape” key. Then hold down shift, and type ZZ.
Then, just do your commit again, but add the message.
The first time you commit, you might get an error like:
19:00:28: *** Please tell me who you are.

Run

  git config --global user.email "you@example.com"
  git config --global user.name "Your Name"
If this is the case, you need to run these two commands, and then do your commit again. In my case, I would do:
git config --global user.email "paul.craven@simpson.edu"
git config --global user.name "Paul Craven"
But you need to use your name and e-mail. Don’t use mine.
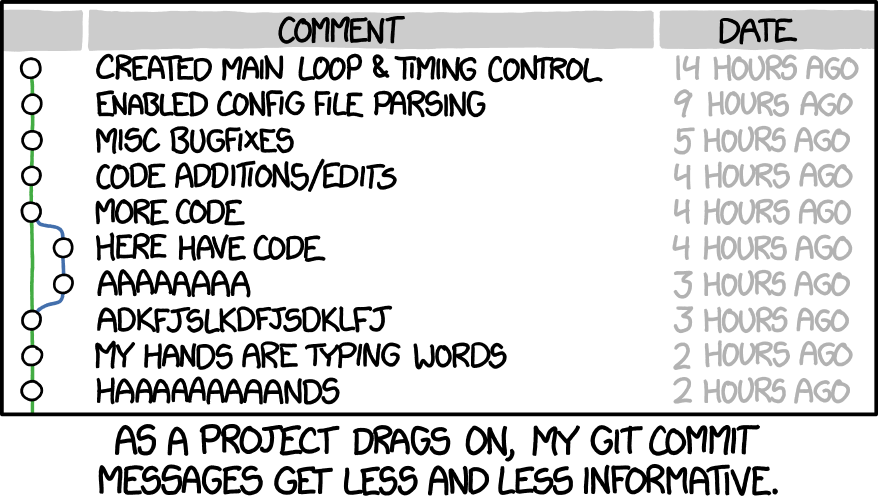
Make good commit messages. But yes, everyone has been here:

3.2.3.9. Gitk
If you type gitk at a command prompt, it will open a window that has a nice
graphical UI showing what is happening with the repository.

This is what I’ll be using to confirm that check-ins with the projects are working well.
3.2.3.10. Git Status
You can see what files changed since the last commit with
git status.

Make sure you understand what each of these commands do.
git init
git add
git commit
git log
git status
These are other commands we’ll cover in a bit
git remote
git branch
git merge
git checkout
git push
git fetch
git pull
git clone
3.2.4. Using GitHub To Sync Code
Right now, our repository only exists on our computer. We are going to use the website “GitHub” as a central place to store our changes.
When you have new changes to share, you will “push” the changes to GitHub. When you want to get changes other people have made, you’ll “pull” those changes.
3.2.4.1. Getting Started with GitHub
First, create an account with GitHub. It is a very popular web site for code management. Particularly open-source software, where people share code with each other. In fact, if you are applying for jobs, some companies will ask your GitHub account name to see what kind of work you do.
3.2.4.2. Creating Your Project in GitHub
- One person in your team should create a project. Don’t create a project for each person.
- Give your project a name. All lower case. Separate words with underscores.
Do not use spaces. And don’t actually call your project
my_project_namebecause that would be silly. - Give a short one-sentence description of what your project is.
- Do NOT include a ‘readme’ in your project.
- The other options can be left as default.

- After creating the project, invite the instructor (
pvcravenif it is Dr. Craven) and your team mates. Do this by clicking Settings…Collaborators. Then it will ask for your password. Then start entering usernames.

- Each user will receive an e-mail confirming he or she would like to be part of the project. Click the confirmation link sent.
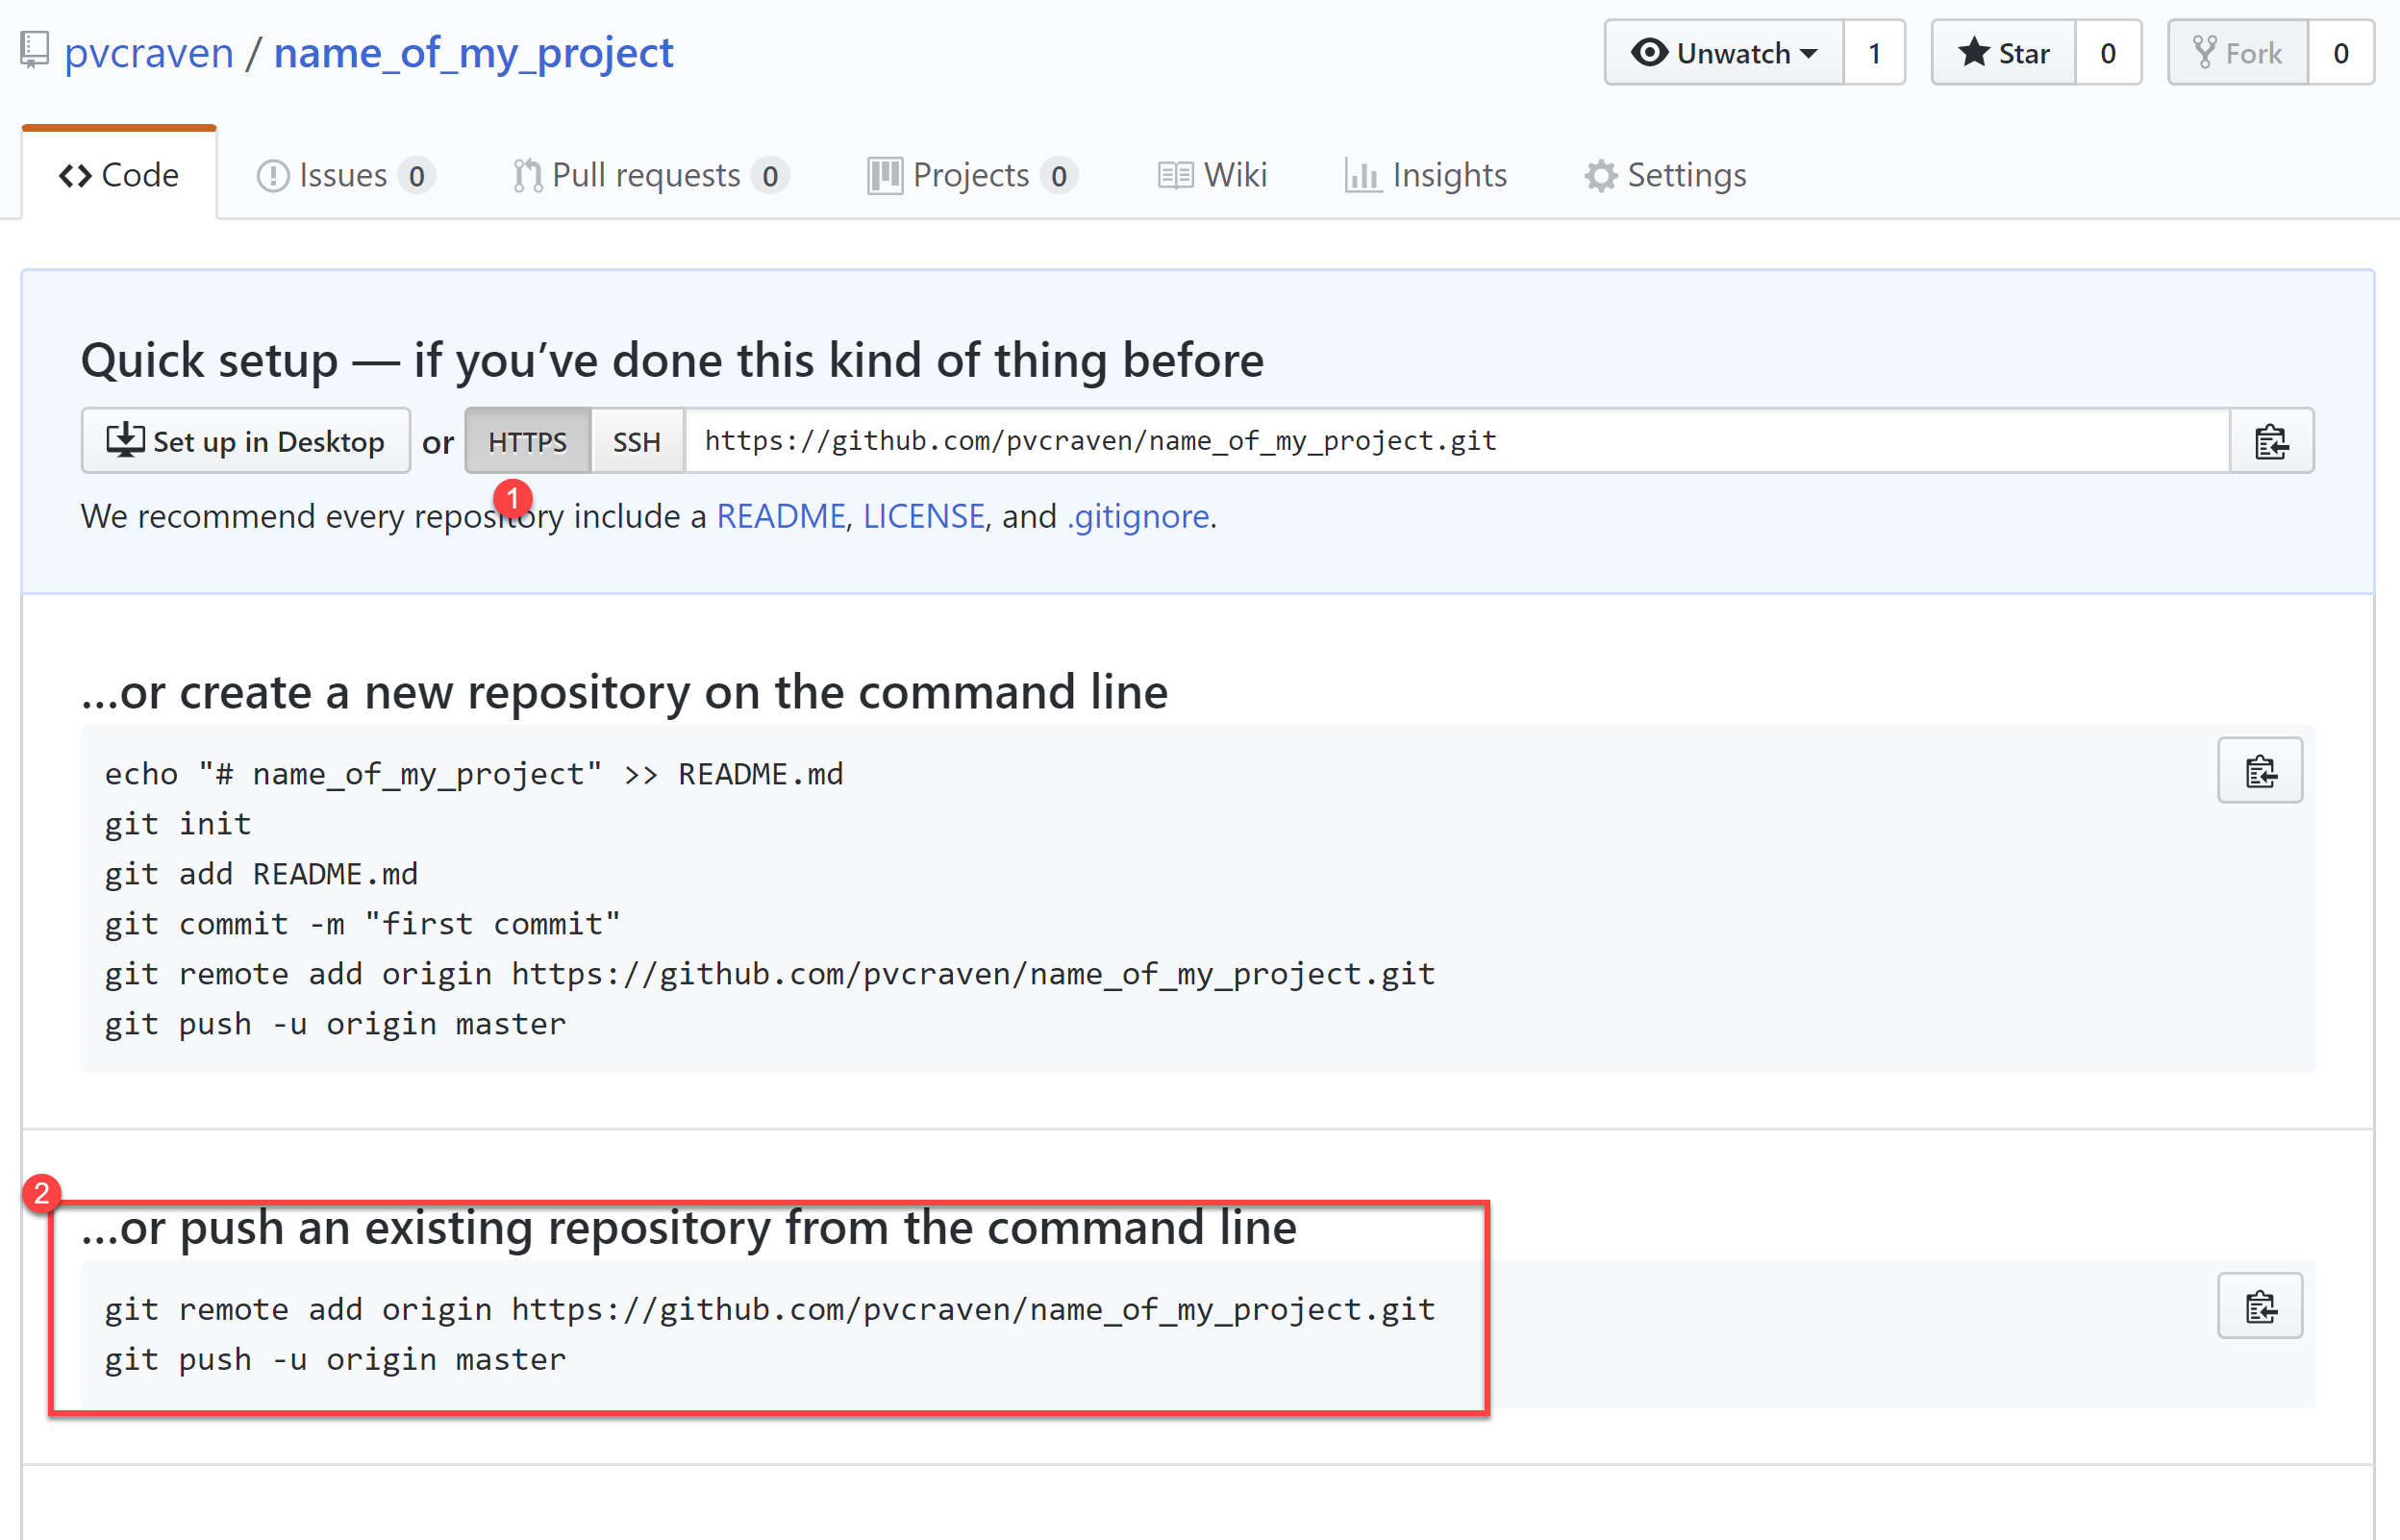
3.2.4.3. Pushing Code To GitHub For The First Time
Now we need to tell the computer where the server is that we can push the code. Thankfully Github makes this easy by giving us the exact commands we need. Make sure you have “https” selected, then copy the two commands into the command prompt, one-by-one:

3.2.4.4. Cloning Your GitHub Project on Your Computer
Ok, we have one person on your team that has a copy of the project, and synced to GitHub. We want everyone on the team to have a copy.
We want to take the project we already have, and create a clone of it on each other team member’s computer.
First, go to Github, and click “code”, and then “Clone or download”. Then copy the text in the field:

Next, open a command prompt. If you are on Windows,
I suggest switching to the desktop
and put your files there with a cd Desktop.
Then, type git clone and paste the text you copied from the website
to clone:

Great! Now you can open the website and make changes.
3.2.4.5. Adding and Committing
When you are done making changes, commit by typeing:
git add -Agit commit -m "My comment goes here."
Review:

3.2.4.8. What If You Can’t Push?
What happens if you can’t push to the server? If you get an error like what’s below? (See highlighted lines.)
  $ git push
  To bitbucket.org:pcraven/arcade-games-work2.git
   ! [rejected]        master -> master (fetch first)
  error: failed to push some refs to 'git@bitbucket.org:pcraven/arcade-games-work2.git'
  hint: Updates were rejected because the remote contains work that you do
  hint: not have locally. This is usually caused by another repository pushing
  hint: to the same ref. You may want to first integrate the remote changes
  hint: (e.g., 'git pull ...') before pushing again.
  hint: See the 'Note about fast-forwards' in 'git push --help' for details.
3.2.4.9. Step 1: Make Sure You Have No Pending Changes
Run a git status and make sure you have nothing to commit.
It should look like this:
craven@DESKTOP-RAUFKMA MINGW64 ~/arcade-games-work2 (master)
$ git status
On branch master
Your branch is up-to-date with 'origin/master'.
nothing to commit, working tree clean
If you do hove code to commit, jump up to Commit Changes and then come back here.
3.2.4.10. Step 2: Pull Changes From The Server
Pull changes from the server:
$ git pull
Normally, this will work fine and you’ll be done. But if you have other computers that you are coding on, the computer will automatically try to merge.
3.2.4.10.1. Step 2A: Merging
If you get a screen like the image below, the computer automatically
merged your code bases. It now wants you to type in a comment for the
merge. We’ll take the default comment.
Hold down the shift key and type ZZ.
If that doesn’t work, hit escape, and then try again.
(You are in an editor called vim and it is asking you for a comment about merging the files. Unfortunately vim is really hard to learn. Shift-ZZ is the command to save, and all we want to do is get out of it and move on.)
It should finish with something that looks like:
craven@DESKTOP-RAUFKMA MINGW64 ~/arcade-games-work2 (master)
Merge made by the 'recursive' strategy.
 Lab 01 - First Program/lab_01.py | 3 ++-
 1 file changed, 2 insertions(+), 1 deletion(-)
If instead you get this:
Then we edited the same file in the same spot. We have to tell the computer if we want our changes, or the changes on the other computer.
3.2.4.10.2. Step 2B: Resolving a Merge Conflict
Do a git status. It should look something like this:
$ git status
On branch master
Your branch and 'origin/master' have diverged,
and have 1 and 1 different commits each, respectively.
  (use "git pull" to merge the remote branch into yours)
You have unmerged paths.
  (fix conflicts and run "git commit")
  (use "git merge --abort" to abort the merge)

Unmerged paths:
  (use "git add <file>..." to mark resolution)

        both modified:   Lab 01 - First Program/lab_01.py

no changes added to commit (use "git add" and/or "git commit -a")
The key thing to look for is any file that says both modified.
If you want your copy, type:
$ git checkout --ours "Lab 01 - First Program/lab_01.py"
If instead you want their copy (or the copy on the other computer) type
$ git checkout --theirs "Lab 01 - First Program/lab_01.py"
Then when you are all done with all merges, type:
craven@DESKTOP-RAUFKMA MINGW64 ~/arcade-games-work2 (master|MERGING)
$ git add -A

craven@DESKTOP-RAUFKMA MINGW64 ~/arcade-games-work2 (master|MERGING)
$ git commit -m"Merged"
[master e083f36] Merged

craven@DESKTOP-RAUFKMA MINGW64 ~/arcade-games-work2 (master)
$ git push
Counting objects: 5, done.
Delta compression using up to 8 threads.
Compressing objects: 100% (5/5), done.
Writing objects: 100% (5/5), 531 bytes | 0 bytes/s, done.
Total 5 (delta 2), reused 0 (delta 0)
To bitbucket.org:pcraven/arcade-games-work2.git
   6a8f398..e083f36  master -> master
3.2.4.11. Step 3: Try Pushing Again
$ git push
Counting objects: 6, done.
Delta compression using up to 8 threads.
Compressing objects: 100% (4/4), done.
Writing objects: 100% (6/6), 604 bytes | 0 bytes/s, done.
Total 6 (delta 2), reused 0 (delta 0)
To bitbucket.org:pcraven/arcade-games-work2.git
   d66b008..aeb9cf3  master -> master
3.2.5. Longer Git Command Reference
In my experience with 300 level group-project classes, these commands seem to capture most of what students need to do.
| Command | Description |
|---|---|
git status |
See what has changed |
git fetch |
Grab stuff from the server, but don’t merge |
git merge --no-commit --no-ff test_branch |
Merge |
git merge --abort |
Abort a merge |
git pull |
Fetch and Merge |
git add myfile.txt |
Add myfile.txt to be committed |
git add . |
Add everything |
grep -r "<< HEAD" * |
Search all files to see if there is merge error text. Do this before committing |
git checkout --ours "myfile.txt" |
Toss your changes in a merge, use theirs. Add your change when done. |
git checkout --theirs "myfile.txt" |
Toss their changes, use yours. Add your change when done. |
git checkout -- . |
Remove all your changes, go back to what was last committed. Untracked files are kept. |
git -f clean |
Remove untracked files |
git checkout 44fd |
Find the hash of a check-in, and you can go back to that check in. (Don’t use 44fd, but replace with the has you want.) |
git checkout master |
Go back to most recent check in on the master branch. |
git commit -m "My message" |
Commit your work. Use a descriptive message or the other people in the class will be irritated with you. |
git push |
Push commit up to the server. |